


একটি সুসংগত প্রতিস্থাপনের অনুরোধের পূর্বে কিভাবে H.1, D1, D2, D2 ফিল্টারের জন্য থ্রেড এবং সংযোগের মাত্রা পরিমাপ করতে হবে তা শিখুন ।.
ভূমিকা
একটি আনহরালিক ফিল্টারকে সহজ মনে হতে পারে, কিন্তু একটি ছোট মাত্রাগত পার্থক্য ইনস্টলেশনের ক্ষেত্রে বাধা দিতে পারে, অথবা একটি অকার্যকর প্রতিস্থাপন করতে পারে। উচ্চতা, ঘরের বাইরে, প্রবেশের জায়গা, থ্রেড টাইপ, এবং সংযোগ স্টাইলের মধ্যে প্রায়শ:ই একটি সরবরাহকারীর প্রয়োজন হয় যখন কোন অংশ হারিয়ে যায়, পাঠযোগ্য নয়, অথবা নিজের জন্য যথেষ্ট নয়।.
সঠিক পরিমাপ করা বিশেষ করে বিভিন্ন দল, বিভাগ ক্রয় করা, এবং যন্ত্রপাতি মালিকদের জন্য গুরুত্বপূর্ণ, যারা দীর্ঘ সময়ের জন্য কোন উপাদান বন্ধ না করে একটি ফিল্টার পরিবর্তন করতে হবে। এর লক্ষ্য শুধু শারীরিক চাহিদা পূরণ করা নয় । পরিবর্তে, প্রয়োজনীয় প্রবাহ, চাপ, তাপমাত্রা, তরল তাপমাত্রা এবং অপারেটিং তাপমাত্রাকে সমর্থন করতে হবে ।.
এই গাইড ব্যাখ্যা করে যে, কীভাবে জলশূন্য ফিল্টারের মূল মাত্রা পরিমাপ করতে হয় এবং কীভাবে তথ্যকে স্পষ্টভাবে লিপিবদ্ধ করতে হয় । এ ছাড়া, আদেশ দেওয়ার আগে যে - অতিরিক্ত অতিরিক্ত বিষয়গুলো নিশ্চিত করা উচিত, সেগুলোও অন্তর্ভুক্ত করা উচিত ।.
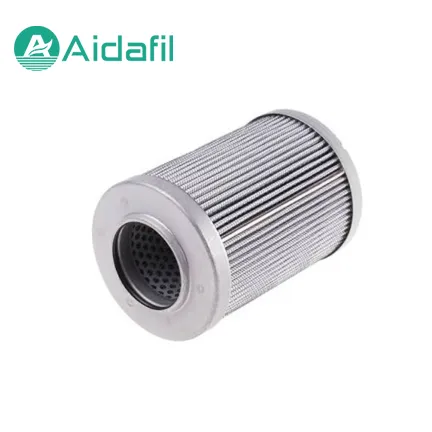
কেন সঠিক ফিল্টার বিষয়বস্তু পরিমাপ করে
একটি জলহস্তী ফিল্টার একটি আবাসন বা ফিল্টারের মধ্যে অবস্থান করছে। প্রাকৃতিক উপাদানগুলোকে অবশ্যই শেষ পর্যন্ত সঠিকভাবে সিলমোহর করতে হবে, বিভিন্ন চাপের মধ্যে স্থির থাকতে হবে এবং দূষিত তেল এড়িয়ে যেতে হবে। যদি উচ্চতা ভুল হয়, তবে কাঠামোটি হয়তো সীল সঠিকভাবে না চলতে পারে । এটা হয়তো বাড়ি নির্মাণ করতে পারবে না । যদি ভিতরে প্রবেশ করা বা সংযোগ করা ভুল হয়, তাহলে কেন্দ্র টিউব বা ফুটপাথের মধ্যে কোন উপাদান খুঁজে পাওয়া যায় না ।.
শুধুমাত্র দিকমাত্রাই ব্যর্থতার নিশ্চয়তা দেয় না, কিন্তু তারা প্রথম ব্যবহারিক মানচিত্র সরবরাহ করে। তারা একই ধরনের পণ্য পরিবারের মধ্যে পার্থক্য, সম্ভব বিকল্প সনাক্ত করতে এবং ভুল নমুনা বা অংশ পাঠানোর ঝুঁকি কমাতে সাহায্য করে ।.
কাজের এলাকা এবং যন্ত্রপাতি প্রস্তুত করুন
উপাদান সরিয়ে ফেলার আগে, ওয়ারড্রিয়ান লাইনের বিচ্ছিন্ন করে ফেলুন এবং যন্ত্রপাতি নির্মাতার নিরাপত্তা প্রক্রিয়া অনুসরণ করুন। তাই, তেল ব্যবহার করার জন্য তেল ব্যবহার করুন । পরিষ্কার - পরিচ্ছন্ন রাখুন কারণ পরীক্ষা করার সময় দূষণ প্রতিস্থাপনের ওপর প্রভাব ফেলতে পারে ।.
এক ব্যবহারিক পরিমাপ:
- একটি ব্লুমরী সিপার অথবা ডিজিটাল ক্লিপার
- A steel rule for overall height checks
- A thread pitch gauge where available
- Clean paper or a measurement sheet
- A camera for clear reference photographs
- A marker and a clean container for the removed element
Measure the actual element rather than relying only on a catalog drawing. If the element is damaged or crushed, note the deformation and use several measurements to estimate the original dimensions.
How to Measure Overall Height (H)
Place the filter element upright on a clean flat surface. Measure from the main upper reference face to the main lower reference face. Record whether the measurement includes end caps, seal lips, locating lugs, or protruding fittings. The meaning of H can differ between product drawings, so always describe the reference points used.
For example, an overall height measured across the complete end caps may differ from an effective sealing height measured between the seal contact surfaces. If the drawing shows a specific definition of H, follow that definition. Otherwise, record both the overall height and any clearly visible sealing height.
Take at least three readings around the element and use the consistent result. If the readings vary, check whether the end caps are bent, the element is distorted, or the surface is not flat.
How to Measure Outside Diameter (D1)
Measure the outside diameter across the main cylindrical body. Avoid measuring only a label, protective band, or deformed pleat. Take readings at both ends and near the middle. For elements with a stepped body, record each diameter and its axial position.
The largest functional diameter is usually the critical value. A raised seam, end-cap flange, or seal may determine whether the element enters the housing. Note these features separately instead of averaging them into one diameter.
How to Measure Inside Diameter (D2)
Measure the inside diameter through the central opening. If the element has a center tube, measure the clear opening at the sealing or locating area shown on the product drawing. For elements with different openings at each end, measure both ends and label them clearly.
Do not measure across an obstruction such as a spring, bypass component, or inner cage unless that feature is part of the required interface. Record the location of the measurement so the supplier can compare it with the correct drawing.
How to Identify Thread and Connection Details
Thread and connection details cannot be confirmed by diameter alone. Record whether the connection is male or female, the nominal thread size, the thread standard, and the sealing method. A thread pitch gauge is useful when the thread is accessible.
Common connection checks include:
- Male or female thread
- Nominal thread size
- Thread pitch and standard
- Flat seal, O-ring seal, tapered seal, or another sealing method
- Thread length and unthreaded shoulder
- Center-tube engagement
- Orientation of inlet and outlet features
Do not force a thread gauge or replacement element into a damaged connection. If the thread identification is uncertain, take a close photograph with a scale beside the thread and send the equipment model with the inquiry.
Additional Details to Confirm Before Replacement
A complete replacement record should include more than H, D1, and D2. Where available, add:
- Filtration rating and whether it is nominal or absolute
- Filter media type
- Seal material
- Maximum operating pressure
- Normal and maximum differential pressure
- Flow rate
- Fluid type and viscosity
- Operating temperature
- Bypass valve arrangement
- Collapse pressure requirement
- Equipment make, model, and filter location
These details help determine whether a physically similar element is suitable for the application. A filter that fits may still be unsuitable if its media, seals, pressure rating, or flow capacity does not match the system.
Recommended Measurement Record
Use a simple record like this:
1. Equipment model and filter location
2. Existing part number or marking
3. Overall height H
4. Outside diameter D1
5. Inside diameter D2 at each end
6. Thread or connection details
7. Filtration rating and media
8. Seal material
9. Flow, pressure, and temperature
10. Photographs of the element, markings, seals, and connection
Include a ruler or caliper in photographs when possible. Clear images often answer questions that are difficult to explain in a short message.
Common Measuring Mistakes
One common mistake is measuring only the element body and ignoring end caps or seals. Another is measuring a distorted element after it has collapsed and treating the damaged dimension as the original specification. Mixing imperial and metric readings without labeling them can also cause errors.
Teams sometimes rely on a part number alone even though the number has several versions, suffixes, or superseded references. In other cases, they identify a thread by diameter but do not confirm pitch or sealing type.
Finally, avoid estimating dimensions from a photograph without a scale. A photo is useful for checking the general shape, but it is not a substitute for a physical measurement.
How to Request a Dimensional Check
Send the existing part number, equipment model, measured dimensions, and photographs to AIDA. State which measurement points were used for H, D1, and D2, and include the filtration rating or operating requirements if known. If the element is unavailable, send the housing opening, center tube, seal area, and connection details instead.
A technical review can identify whether more information is needed before a replacement option is proposed. For products with several possible configurations, a dimensional check is safer than matching one number without context.
Contact AIDA:** https://www.aidafilter.com/contact-us
Browse hydraulic filter elements:** https://www.aidafilter.com/alternative-filter-element/
View the product catalog:** https://www.aidafilter.com/products/


